Friday, November 17, 2023

Another Bench: Mission style this time

Mission style bench in walnut

I seem to be in a bench-building phase. There are a variety of styles that encourage different techniques in joining, layout, cutting and finishing. That probably explains why I always feel like a complete beginner making the next one.

I'm following Rex Krueger's plans (https://tinyurl.com/3tkut342), but rather loosely. The first change: Susan suggested using a "darker wood" this time. So I got in touch with Dick Ratcliff at http://www.heartwoodcreations.org/ again. He found a nice walnut live-edged slab and was kind enough to plane it to the thickness I wanted. As I mentioned in my Moravian stool post, Dick is a great guy to deal with when you need wood.

I also decided not to use nailed construction. Rex does a good job explaining it, and I know it's a real technique with a long history, but it just wasn't the look I wanted. I'm always trying to use contrasting woods, and here I'm using birch dowels in place of the cut nails. It was a lot more effort than I anticipated. A particular challenge was holding the various parts in alignment before drilling the dowel holes. It took more time to rig that up than it took to drill the holes, and then I discovered a couple weren't aligned anyway. So even more time spent making a patch.

Keeping parts aligned for dowel drilling

Finished dowel joint

Now, about that live edge: keep it or cut it off, leaving just the heartwood? I kept part of the sapwood on the legs (they are tapered, rather than rectangular) and all of it on the top. So the bench top has one side that is not straight...my first foray into a live edge project.

The legs need to be identical, so I used Rex's technique of double-sided tape to hold the blanks together while I cut the tapers with a circular saw. Then I separated them and used a jigsaw to cut the ogee curves that form the feet. I was happy to see how smoothly that went, after watching jigsaw tips from the Honest Carpenter (https://www.youtube.com/watch?v=Fsdsp3cxLlc). I wasn't as lucky when notching the legs to hold the aprons. I used my Japanese style pull saw and one cut got far off track. Another patch was needed there. Things like that are why I call my work "rustic".

The plans call for nailing the bench top to the base. Eschewing nails, I thought maybe I'd use dowels on the top too. But the top is the prettiest piece of the walnut. Instead I used Z clips to fasten the top on. Another new technique. Let's see if they hold up to wood movement as they are supposed to.

The finish is Waterlox Original. I hadn't used it before, and I'm happy with the warm semigloss result.


Monday, August 28, 2023

A Moravian style stool

[Note: the following has a lot of details about this build. Feel free to just look at the pictures.]

I've been working on a Moravian stool. Such stools are distinguished by a pair of battens attached to the underside of the seat in sliding dovetails. The legs are mortised through the battens and through the seat, and then wedged.

There are a couple advantages of this construction, as I understand it. The seat can be made of thinner wood, since it is reinforced beneath. And if the seat is made of two boards edge-jointed, the seam is susceptible to cracking but will still be usable because the boards are held in place by the battens. Both advantages can result in a more economical piece. There is an excellent article about them in Popular Woodworking here.

I used cherry for the seat and legs and maple for the battens, because I like contrasting woods. But after finish was applied, the contrast was much reduced. The woods posed a couple of other problems too.

First, I had never purchased cherry or maple. Almost all my other pieces have been in softwoods, along with some walnut gifted to me by generous friends. I went to a Woodcraft store but was daunted by the size and price of the available cherry stock. The staff weren't particularly helpful either. About this time my wife and I attended a "meet the maker" event at Strathmore Mansion in Rockville, MD. One of the makers was Dick Ratliff of Heartwood Creations. Dick retired from tree service to become a superb maker of furniture and other goodies. As we chatted and I described my stool project, he revealed that he has a large stock of wood he saved from trees during his career. I emailed him what I needed and in a few days I picked up both cherry and maple from his shop (added bonus: I got a shop tour). He has a large number of species. Look him up if you need something...he probably has it.

The second problem was my inexperience with hardwoods. Planing the cherry for the seat and legs was time-consuming but not too difficult. Cutting the dovetails into the cherry and especially into the maple was a challenge. I followed plans from YouTube creator Rex Krueger, who has you build a "scratch stock" to help finish the dovetail profiles, after you've sawn them approximately. Many hours went into those, and the finished dovetail joints aren't beautiful. But it was good experience. It's nice to be able to make a useful tool too. Speaking of that, I also used a router plane built from a Rex Krueger kit that worked well smoothing the bottoms of the dovetail slots.

Scratch Stock

Router plane from kit


I like using hand tools but I'm not a zealot. I cut the stock to their rough sizes using my friend Bruce's bandsaw. I've bored leg mortises with a handheld drill in the past and never quite got the angles right. So I ordered a drill press. The Wen 4214 has a twelve-inch swing, decent reviews and a very attractive price. After clearing some junk from the garage I bought a tool stand from Harbor Freight, made a plywood top and a shelf, and I was in business. The mortise holes were easy to drill.

Drill Press on stand
Drilling leg mortises

For finish I chose shellac. I've used it on other projects and been happy with it. I've heard that the premixed brands have a limited shelf life, and the only cans I had were past their prime, so I decided to buy shellac flakes and mix my own. That way I know it's fresh and I can mix up only as much as I need. The downside is finding it (not at Woodcraft; I got mine online from Lee Valley Tools) and mixing it. It takes a couple hours to dissolve the flakes in the alcohol, even using a coffee/spice grinder to reduce the flakes first. But you save so much time with shellac because it dries so quickly. I put three coats on in less time than it took the flakes to dissolve. I was happy. The surface of the seat wasn't completely smooth despite my best efforts with plane, card scraper and sandpaper. That caused a less-than-perfect finish, but hey! I'm still learning!

Moravian style stool in cherry and maple


Friday, June 2, 2023

Some Woodworking Updates

In the past couple of years I've made a few wood projects I'd like to share here.


A box for Dana

 Our friend Dana passed away in 2021. His daughter, recalling the cherry tree in their yard when she was young, asked me to built a cherry container for some of her father's cremains. The box was constructed using mostly hand tools.


I wanted to try bending wood. After seeing some tool totes online I decided to make one using an oak dowel for the bent handle. I soaked the dowel in water plus fabric softener for a week, then in hot water for about an hour. I placed it into a rough jig and clamped it overnight. The rest of the tote is made from old shelving (the bottom and ends) and leftover tongue-and-groove paneling (the sides). No nails, screws or glue were used.

Tool Tote

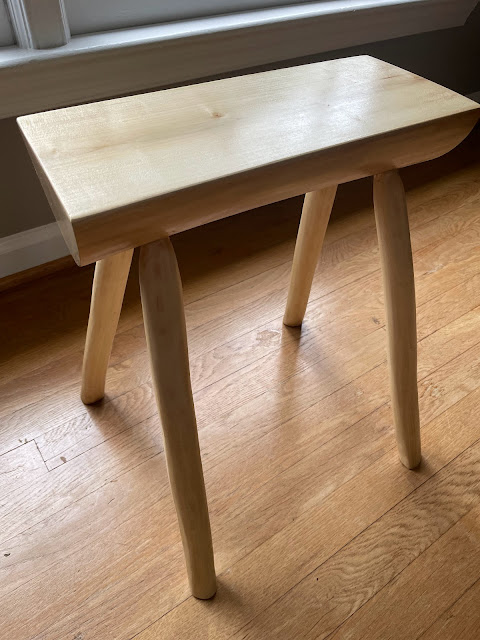
I also wanted to try working with greenwood (i.e. freshly cut, not seasoned). A neighbor's maple tree lost a large limb in a storm, so I used two pieces of it to make a stool. The ends of one piece were sealed with shellac to keep it from drying, and set aside. The other piece was split with froe and maul for the legs, which were shaped using drawknife and spokeshave. When the legs were ready, the other piece was split and barked to make the seat, then drilled for the legs to be inserted. Because the legs were drier than the seat, they swelled as they absorbed moisture from the seat. And the seat shrank as it dried. That's how greenwood furniture joints become tight without use of fasteners or glue. After nearly a year the legs are as tight as ever.

Maple greenwood stool


Monday, May 29, 2023

The Inside Passage

After a long pandemic hiatus Susan and I recently resumed travel, taking a small ship cruise through part of the Inside Passage in Southeast Alaska. On a friend's recommendation we booked with Uncruise (https://uncruise.com/pages/alaskan-adventures). We were delighted with the voyage, the locations, the wildlife, the expedition leaders and ship's crew, and the activities. Highly recommended.

Having travelled to Patagonia we suspected the Inside Passage environment would be similarly elemental and beautiful, and it is. An advantage of the Uncruise approach is the off-ship activities available each day. They included kayaking, hiking and bushwacking, skiff tours and paddleboarding. Wildlife is abundant: we saw bald eagles, sea lions, seals, otters, bears and several humpback whales (one from a kayak). Our fellow passengers were friendly nature-lovers and our expedition leaders were well-informed and enthusiastic. It was an amazing trip. 


Mountain from Tracy Arm

 
Near Elfin Cove


Elfin Cove sunset


Forest Floor, Kuiu Island


Margerie Glacier, Glacier Bay NP


Wednesday, February 2, 2022

Ice in the stream

Out walking recently, I found intriguing ice patterns in a small stream. My guess is that the stream level was dropping and ice formed at different levels as it fell. The picture was taken under a footbridge, which shows as dark bars reflected in the water. I don't always love frigid weather, but this was a good morning.

Ice in a Stream


Sunday, June 20, 2021

Woodworking

After winding up my folding desk efforts, I've made a few more projects.
This is a shaker style table with a birch plywood top, red oak aprons, and laminated pine legs.
A yard sculpture titled "Blue Tensegrity", after Buckminster Fuller's term for structures using isolated compression elements and tension elements. Made of two-by-two pine construction lumber and one-sixteenth inch stainless steel cable.
A paper towel dispenser with half-lap joints in pine, with a cherry handle.

Wednesday, December 16, 2020

Plans for folding desk, by Dean Wight

Links to plans for folding desks are at the end of this post.

Update January 31, 2021: Someone asked for photos of desks, so I'm posting a few here. 

Modified Desk, folded

Modified Desk, partially open

Modified Desk, open position

Update January 16, 2021: Plans for the modified folding desk are at the end of this post, together with the original plans. Feel free to add comments and suggestions.

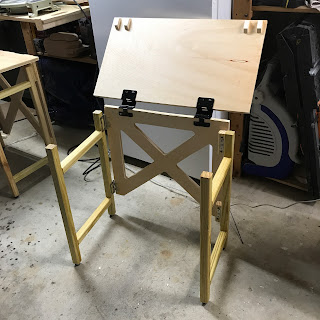
Update January 11, 2021: I have made modifications to the folding desk, and I will revise the plans shortly. In brief, the changes are (a) switched to non-mortising hinges because they are lighter and fold slightly flatter than door hinges; (b) removed plywood cross-braces and replaced them with 2 by 2 braces mounted in-between, rather than on top of, the legs, reducing weight and allowing legs to fold flatter; (c) removed about 3 pounds of material using cutouts in the back panel.

Non-mortising hinges

Back panel with cutouts

This link leads to a PDF of plans for the modified folding desk:

https://drive.google.com/file/d/1McVcGjI1rEaR4GnTgM2t0dBIYqUrl1q6/view?usp=sharing

This link leads to a PDF of plans, drawings and photos of the folding desk developed for Desks by Dads in Gaithersburg MD.

 https://drive.google.com/file/d/15WAL9oG1CaBKSEEipo8VNOVb0UVCp1A6/view?usp=sharing